First need to install
Java.
2.
Now you can see the following image:

3.
Complete installation from this page.
Now install eclipse:
1. Go to http://www.eclipse.org/downloads/
2. From this link download eclipse.

3.
After complete download run eclipse.

4. Now select workspace and click on “OK” button.

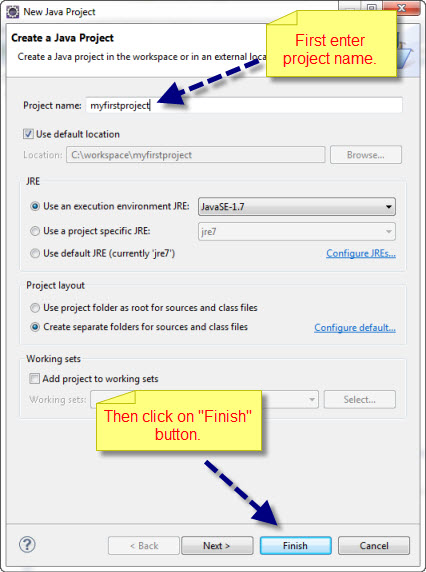
5. Now create a java project as the following
picture:

6.
Now enter project name then click on “Finish”
button.
7. Now create a package under my created project.

8. First enter package name then click on “Finish”
button.

9.
Now create a class under my created package.

10.
First enter class name then click on “Finish”
button.

11.
Now you can see the following image:

12.
Go to http://docs.seleniumhq.org/download/
13.
Download the following file.

14.
Now right click on Package name then select Build
Path then click on “Configure Build
Path”.

15.
Now click on “Libraries”.
16.
Now click on “Add External JARs”.
17.
Select jar files and click on Open.

18.
Now we can write our Junit code into our created class.
19. Here is an example of Junit code for open an web site:
package myfirstpackage;
import org.junit.*;
import
org.openqa.selenium.*;
import
org.openqa.selenium.firefox.FirefoxDriver;
public class myfirstclass {
private WebDriver driver;
private String baseUrl;
@Test
public void
Test_Google_Chrome() throws Exception {
driver = new FirefoxDriver();
baseUrl = "http://www.iams.com/";
driver.get(baseUrl);
}
}
|